
Articles on audio engineering
& church sound
Fundamentals before fancy
Everybody’s obsessed with the latest plugins these days, looking up YouTube videos on parallel processing, and other cool-sounding tricks. And all of that is really good, but don’t start with that.
If you’re a relative newbie, just learn how to listen and balance things. Faders are engineered to move up and down, so do that. Can you hear all the vocal parts? Know what an alto is? Can you distinguish the various guitars? Push the lead vocals as necessary to keep them in front of the band. Bring up that guitar solo a bit, or the riff between verses from the keyboard. Adjust for different keyboard patches, some being louder than others. Some keyboard parts need to be loud, like a pipe organ. Others far lower and in the background, such as a string pad. Learn what this sounds like and what you’re listening for musically. That’s far more important than twiddling knobs on a plugin.
Clean up your mixes with high-pass filters
Even if you don’t know much of anything about EQ, compressors, bussing, or whatever, one of the best and easiest things you can do to clean up your mixes is with a high-pass filter.
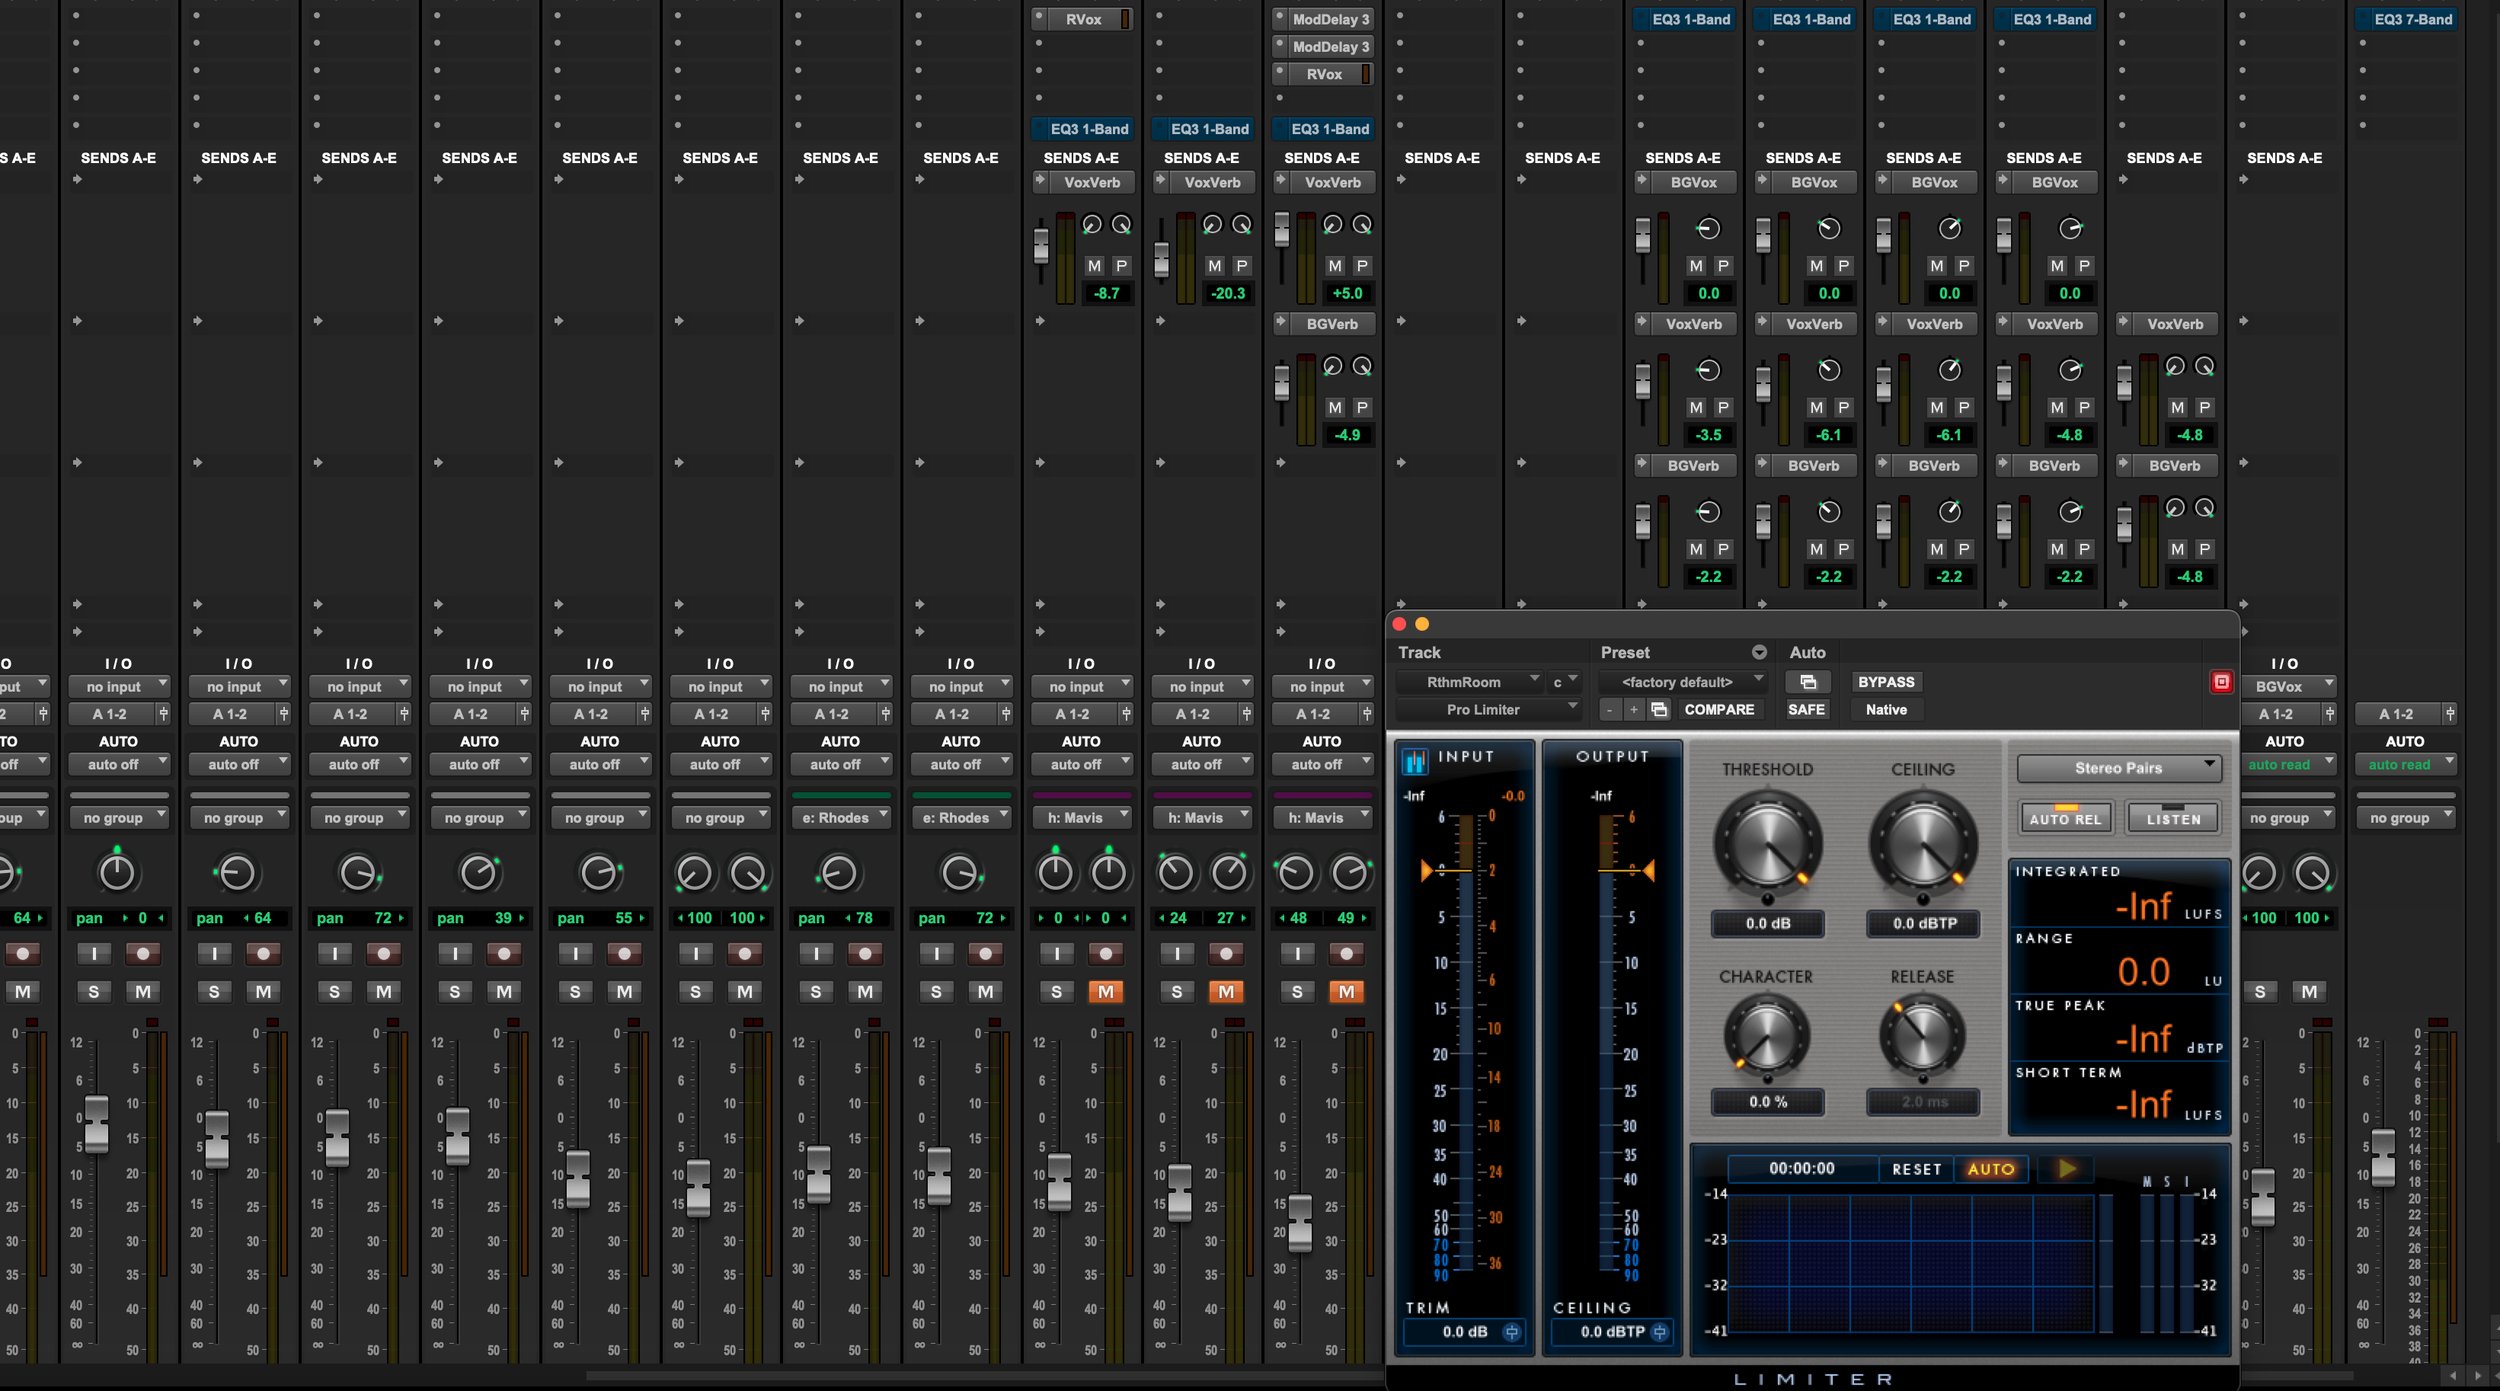
Different from other EQ controls, high-pass filters (also known as a low-cut) do not boost signal level. All they do is severely attenuate sounds below a certain frequency point (thereby allowing the higher frequencies to pass through). The screenshot below shows the left side of the EQ window with a high-pass activated. The controls on the far left, labeled “HPF,” allow you to select the frequency point at which attenuation kicks in (called the cutoff frequency, and is actually 3dB below unity) as well as how steeply the attenuation occurs. Slope is measured in dB/oct, so a higher number indicates a more rapid attenuation as you go down the frequency spectrum.

So how does this magically help your mixes? Except for low frequency-heavy sources such as bass guitar, kick drum, etc, there’s nothing useful or musical down there. But there is noise—low-end rumble from stage leakage (drums, guitar amps, footsteps, other musicians), HVAC, etc. All of this garbage, even if low-level, gets added to your mix, meaning your PA speakers have to reproduce that along with the good stuff. They can do a cleaner job without it, so get rid of it everywhere. Put a high-pass filter on all your channels except bass, kick, maybe piano (I’ll come back to this in just a bit…).
If you are a newbie (it’s okay, just admit it and get to work) just turn them on and set to 80Hz. But when you have some time to experiment, run some tracks through the console and, one at a time, adjust the frequency select on the filter. Slowly turn it higher until you begin to hear the low end of the sound start to go away. You don’t want to lose the body of the sound, so dial it back a tad and you’re set. Sometimes we dial it higher for vocals in order to reduce plosives, though it won’t work entirely because those sounds aren’t just low frequencies.
Getting back to the low frequency instruments, you can put filters on bass guitar, kick, and piano. Dial the frequency select up just enough to eliminate very low-end rumble and boominess. Depending on your PA system and room acoustics, these low frequencies (say below 50ish) might get too boomy. So just roll those off, which still leaves the main body and fullness of the instruments.
This trick also works great for studio mixing, so use them the same way, though maybe not set quite as high. As always, use your ears.
Old-school analog studio mixing
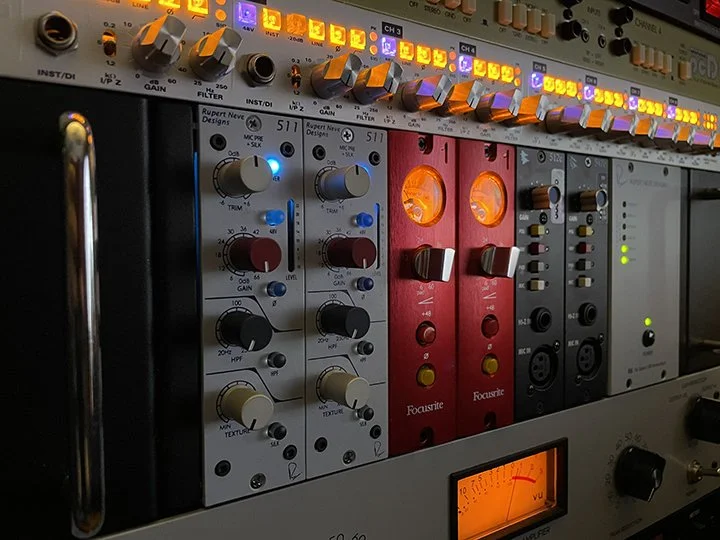
I have an old Otari MX80 24-track, 2” tape recorder in one of my recording studios at school. It’s in rough shape—it’s over 30 years old after all—and needs some detailed attention. But I spent an hour today cranking it up, transferring a song project from Pro Tools, and doing a quick, rough mix using only the analog gear in the room. Analog console, patchbay, outboard processors, that’s it. I even turned the computer off, ‘cuz we didn’t have a screen staring at us in the 80s.
I took a few photos to show the setup. One of these days I want to get one of our student bands in the studio and record an EP or something completely old-school—no Pro Tools. No computer. Just straight to the tape machine, using console EQ, faders (automation means you move it yourself at the right time), outboard processors, and so on. That’d be a total blast. BTW, see the cables patched into the console below? That’s where the term “plug-in” comes from; you’re literally plugging in an outboard compressor or whatever into the console channel, just like in a DAW.


Audio compression
Probably the most difficult signal processor to understand is a compressor. Most people get the idea that it squashes a sound, but that’s as far as it goes. Below is an excerpt from my Recording Audio book. Read through this, think about it, but then spend a lot of time playing with various recorded tracks going through a compressor. Experiment with the controls and get a feel for how they affect the sound. Where to start with the settings? Try this:
Set attack to fast, medium release.
Output gain to zero.
Ratio 3:1
Threshold around -10 or so.
Threshold is the magic one for now. Play your recorded track and turn the threshold down. You’ll see the gain reduction meter light up, indicating that output level is being reduced. Enough of this and you’ll hear it sounding more squashed. Find a balance, so perhaps set it for just a few dB gain reduction. And now, the excerpt:
A compressor is a signal processor that limits how much an audio signal varies from soft to loud. As the incoming signal gets higher, the compressor will reduce this so it sounds more even. Think of it as a volume cruise control for audio.

Compressor functions
Threshold is the signal level at which the device begins to compress. Any signal that is higher than the threshold will get attenuated, meaning it won’t be so loud coming out the other end. Threshold doesn’t directly dictate how much compression will be applied, only the point at which the device starts doing its thing. A high threshold will only compress the highest, loudest levels in the signal, whereas a lower threshold affects more of the entire signal.
Ratio sets how much the signal will be reduced. Once a signal goes over the threshold point, it will be attenuated at a rate set by the ratio. For example, if you set it at 3:1, every 3dB of signal beyond threshold will result in only 1dB coming out of the compressor (smaller dB numbers are quieter). Since these are ratios, multiples apply here, meaning if 9dB of signal goes over threshold, it will output 3dB.

A signal going over threshold triggers the processor to start compressing, but we can control how quickly it gets to its full reduction setting. This is the attack time; a fast attack setting will very quickly reach maximum gain reduction once threshold is reached, whereas a slower attack will take its own sweet time to get there. This is a big deal because it affects the tone of the sound as well—a really fast attack will lose the initial bite or attack of the sound, giving you a more rounded tone. Lengthening the attack time will allow that bite to come through before the overall dynamic range gets limited. Many people misunderstand this concept, believing that a longer attack time means the processor sets a timer before beginning the compression cycle. Not so. The technical term for what you’re shaping is called transients, which are the very first high frequency components of a sound that happen when an instrument is plucked or hit. So, turning the attack time up and down will give you a brighter or duller tone.

Many compressors also provide a knee setting, which effectively broadens the threshold point into more of a range. Once a signal approaches threshold, the processor will initiate a smooth, gradual transition into the compression cycle.
Once the incoming signal begins dying away and falls below threshold, the compressor will “let go” and allow the signal level to return to normal (unity gain). How long does this take? That’s the release time you set. A medium release is usually pretty smooth, whereas a long release may prevent the unit from recovering before the next musical passage begins. This obviously depends on the tempo and what they’re playing. A long release could also extend the life of a note just a bit; as the original sound fades away naturally, the compressor is slowly returning to unity gain, briefly counteracting the decay. A very short release setting can cause the unit to cycle too quickly, resulting in a breathing or pumping sound. Most compressors feature an auto setting option for attack and release, and for the most part it works pretty well. However, go ahead and take control yourself and experiment to make it fit each particular situation.
After a signal goes through a compressor, it’s usually got a lower overall signal level and might sound quieter in your mix. To compensate for this, all compressors have an amplifier at the very end where you can crank it back up a bit (gain). Sounds contradictory, but what’s happening is that once the compressor does its thing, you’ve got a more controlled signal with less dynamic level swings. Now you can take this streamlined signal and crank it up as needed. You set it in the mix and it won’t jump in and out as much.

What happens if you turn down the main mix fader? Well, the overall volume in the room will decrease. The relative balance between parts stays the same. Monitors on stage stay the same. Nothing else changes.
Now, if you turn down the mic preamplifier, does that affect anything? Yup—everything! The preamp is the first thing the signal goes through in the channel, so changing this will affect everything, including any monitor mixes, settings on EQ and compressors, aux sends for reverb, even digital feeds to a Dante network. Set the preamp and leave it alone.
Take time to learn not only how your console routes signals, including reverb and effects, but how the overall system is laid out in the room. How exactly does that floor pocket XLR connector get to a particular channel on the console? What are my options if a certain channel doesn’t seem to be working; can I reroute the mic to a different jack and get it to the same channel? How are the stage monitors being fed? You don’t have to know all the small details, just enough to visualize where everything goes and how it gets there. You’ll be able to operate better, trouble-shoot as needed, and do a better job overall.
Details, Presentation, & Showmanship
Each of us are only aware of things that we’ve been exposed to at some level. A fire suppression expert will walk through the shopping mall staring up at the sprinkler systems and detectors. A writer/editor will notice every misplaced comma. Everyone else is blissfully clueless, including volunteers (and even paid staff) who put together and run overheads and oversee elements of a worship service. These folks typically have no idea of how to assemble everything into a smooth, flowing experience for the congregation. Anybody who’s been in theatre or some related aspect of show business understands concepts of transition, stage placement, cues, timing, and so on. The rest of you simply don’t know the concepts, but you can learn. You just have to know what to look for.
As someone who ran a music and AV ministry for over twenty-some years, I saw myself as a stage manager each week. I would ensure each team member knew what was going on, what they needed to do at precise moments in the service, how we would transition from one element to the next, and many other details. When should the worship team step down off stage after their set? Immediately? During a prayer? Do we want them sitting there during a baptism? When do they return for the closing song? When do the kids go up front for the children’s lesson? After the hymn is done? During the last verse? All of this results in a certain flow, or lack thereof, for the experience.
When exactly does the AV person hit the next slide button during a song? Yes, it matters. Too soon and it’s jarring. Too late and we can’t sing the next line. There’s a natural timing, a rhythm that you need to strive for. And there are lots of other examples, but the point is that you need to learn what you don’t know. You need to know that this makes a difference. No, hardly anybody out there in the room is aware that this is going on. They can just feel that something works better. Or not. Mediocrity is too often our default level. But it costs nothing to step this up, offer a more professional service experience, and thereby improve the end result for everyone in the room. Take the time to pay attention. Think about little details. Look at those slides and ask whether they’re spelled correctly, are they centered, are they formatted in a way that follows the text and phrasing, is it even a nice looking slide? Don’t settle. Christ doesn’t want mediocrity, any more than your boss does.
It matters.
Wireless microphone troubleshooting
Anybody who’s used wireless mics for any length of time will readily agree—nothing beats a wire. The only reason at all to go wireless is for convenience, such as freedom of movement. Having said that, we all have to use them, and thankfully they’ve gotten much better over the years. But here are a few common things you’ll run into.
Dropouts
You’ll lose audio momentarily at what seems at first to be fairly random. Watch closer and you might notice a pattern of where the person is each time. Often this is tied to a dead space in its relation to the receiving antenna. You can ask the person to avoid that spot (not recommended), or you can adjust the antennas on the receiver. Just move them a bit and it might fix the problem. Other issues can be interference from metal ductwork or similar structural materials. Also make sure the person doesn’t have the transmitter box stuffed inside their pants behind their back; this results in a lack of communication with the receiving antenna.
Various loss-of-signal or noise bursts
This could be from low batteries, poor reception, or even outside interference. Always use fresh batteries and test before using. Ensure that the receiver antennas are high enough so as to provide line-of-sight communication with the stage. Just sitting on the console at the back isn’t good enough if people are standing in the way (people are large blobs of water, after all, which doesn’t do well for transmitting signals). Get the antennas above everybody, such as on the back wall. Some digital models allow you to mount the antenna up on the wall and connect down to the receiver via a CAT5 cable. That’s what I run at my church and it works great (AT System 10 Pro Digital). Digital wireless systems are immune from regular RF interference (such as CB radios). The cheaper analog systems are not as good at this.
Conflicting wireless channels
This has gotten trickier with the government reallocating bandwidth for purposes other than audio. If you still have those old 600MHz band systems, get rid of them. They’re illegal and could run into interference. Newer mic systems are really nice for automatically searching for available channels, so follow their stated procedures. More complex wireless systems can be monitored and controlled through software provided by the manufacturers.
Quality of sound
Yes, you get what you pay for. Most of these can work fine, though you might run into performance issues with cheaper models. Our youth program has fairly inexpensive Samson mics that work fine for them; but they don’t hold a candle to the Sennheisers we have in the main sanctuary. Of course these cost nearly $1k each, so go as high as you reasonable can.
Any other thoughts or experiences with wireless?
Presentation notes from Worship Summit Live 3.0
Here is a PDF of my presentation at Worship Summit Live in July 2020. For those of you who attended, it would be more helpful to look at the recent 4-part blog posts where I detailed all this for you. Let me know if you have questions.
Signal levels and routing on the console
Do you know how that mic signal from stage gets into the console? And how that gets to the main mix? It’s a good idea to know signal flow and how to set proper levels along the way. So, here we go…
Signal flow
The big picture, that you’re well aware of, is that mics are plugged into a box of some sort on stage and goes through a conduit to the console, where each signal gets connected to an individual channel. These are all sent to the mix fader, which sends this result back through the conduit backstage to the main amplifiers and speakers.

Let’s finesse that. Looking at your console, the goal is to not see just a bunch of buttons and switches, trying to memorize which one the team leader told you to push. You want to filter out the noise, all the stuff that doesn’t apply. All you want are the controls that get that mic signal through the channel and over to the main mix fader. So, a mic is connected to the input of a channel. That goes down the channel signal path (passing through the EQ, compressor, aux sends, etc) and stops until something routes it onward. This is the assignment matrix, and on a live console it may be as simple as a single LR or Mix button (could also be automatically set in the board, or assigned via setup screen on a digital console). The signal is then routed to the main mix, where it gets combined with everything else and routed back through the snake to the amps and speakers backstage. Here are the operational steps:
Mic preamplifier
Channel fader
Assignment matrix (mix assign switch)
Mix fader

Signal levels
A microphone signal output is extremely low, requiring a significant amount of amplification before it can be used by a console and other gear. This is accomplished by the microphone preamplifier, which is found on every console channel. It’s the first thing a signal runs into, so you crank up the signal to line level, where it can now be passed along to the next stage. (Some churches are running digital consoles connected to a stage head unit; the preamps are located there, and so the signals are amplified in this unit before being converted to digital for transmission to the console.)
The preamp is the first crucial level to be set; too low and you have to turn the channel fader up a lot more, and any digital feeds to a Dante or Aviom-type monitor system won’t have enough signal gain. Too high and it’ll distort. While the musician is playing, gradually turn up the preamp until the meter shows optimal (green, no yellow or red). My TF5 has a nifty graphic display that shows when you’re in the good range.

The next two gain stages on the console are the channel fader and main mix fader, which of course controls everything combined together. The goal is to balance signal level going through each of these stages so you’re not over-compensating anywhere. Once you get the preamp level set, don’t mess with it. Set the main mix fader to 0 and leave it alone. Use the channel faders to mix.
Be aware of how each of these gain stages affect signals along the way. For example, if you turn down the channel fader, does it affect the stage monitors? No, assuming you set your aux sends pre-fader, which is typical for stage monitor mixes. The aux send is grabbing a copy of the channel signal before the channel fader.

What happens if you turn down the main mix fader? Well, the overall volume in the room will decrease. The relative balance between parts stays the same. Monitors on stage stay the same. Nothing else changes.
Now, if you turn down the mic preamplifier, does that affect anything? Yup—everything! The preamp is the first thing the signal goes through in the channel, so changing this will affect everything, including any monitor mixes, settings on EQ and compressors, aux sends for reverb, even digital feeds to a Dante network. Set the preamp and leave it alone.
Take time to learn not only how your console routes signals, including reverb and effects, but how the overall system is laid out in the room. How exactly does that floor pocket XLR connector get to a particular channel on the console? What are my options if a certain channel doesn’t seem to be working; can I reroute the mic to a different jack and get it to the same channel? How are the stage monitors being fed? You don’t have to know all the small details, just enough to visualize where everything goes and how it gets there. You’ll be able to operate better, trouble-shoot as needed, and do a better job overall.
Microphones
Microphones are the most basic, essential tool for running sound each week, so it pays to know just a bit about what makes them unique, what makes them tick, and what to do with them. Here are a few fundamentals of the different types and some pointers on using them effectively for worship services.
There are two primary ways we can design a mic to convert an acoustic soundwave into an electronic signal. You don’t need to know the gritty details, but you do need to know a few characteristics that make a difference on stage. Condenser mics follow a capacitor-type principle for transducing sound waves. What that means to us is that they require phantom power (the +48V button on the channel) and they are far more sensitive than other types of mics. Condensers pick up everything around them, including other singers, musicians, monitor wedges, and the main speakers. Feedback is more of a problem with these mics, and so we generally tend to use them only for certain things such as head mics, piano, drum overheads, choirs, and so forth.
Dynamic microphones are based on electromagnetic induction; move a coil of wire within a magnetic field and it generates an output voltage. Inside the mic is a diaphragm attached to a coil of wire; sound hits the diaphragm, moving it within that magnetic field. In practice, dynamics are less sensitive than condensers, so they work well in live situations with lots of things going on. The converse of this is that they don’t pick up from farther away, so you have to place them fairly close to the source, probably a few inches to a foot or so. Dynamics are good for vocals (that trusty SM58), guitar amps, and drums. There are exceptions, of course, but at least if you know how they tend to behave you can make a better judgement.
The other way we select particular mics and design types is their sound; it’s like an artist’s palette full of different brushes. Condensers have a clear, articulate high frequency response, whereas dynamics are a bit duller on top. Dynamics can sound punchier, which makes them good for drums. The diaphragm size is important as well; notice some mics are fat, others pencil thin. Think about your stereo speakers at home and notice there are at least two different speaker components: the smaller one handles high frequencies (very scientifically named tweeter) while the larger one handles bass frequencies (also cleverly designated the woofer). So, don’t put a thin mic, like a 58, in the kick drum; you’ll get very little bass.

Mics are also designed to pick up sounds from a particular direction. Most often for live situations we want to use uni-directional, or cardioid, meaning they pick up from the front, less so from the edges and rear. It’s not a total cutoff point, though. Sounds coming into the sides and rear are comb-filtered, meaning the mic is trying to get rid of that stuff, but can’t do it completely. Some frequencies will be attenuated, others not so much depending on the relationship between distance and frequency-related wavelengths, resulting in an unnatural sound (the term is off-axis coloration). Find out exactly where the front of the mic is and point that at the source.

For live situations, the challenge is that you’ve got lots of sources on stage making noise. All of this adds up, so we want to minimize sound being picked up by multiple mics. Follow these guidelines:
Keep the mic close to the source. The mic will tend to only pick up that source. It also allows you to run lower levels on the console; when you don’t have to crank it up as much you lower your threshold before feedback. So, keep it close. Train your vocalists and leaders on how to hold the mic properly so it’s not hovering about their waist. Consider this: every time you double the distance between a mic and its source, the level drops roughly 4-6dB (the math indicates 6; it’s a bit fuzzier due to variables in real life). So from two inches from the mouth out to four, you’ve already lost several dB that have to be compensated for by turning up the preamp and fader. That really adds up, so pay attention to distance—it can be your friend rather than a total nightmare.
Point the mic directly at the source; find out where the front is located on the grill. Otherwise it’ll sound weird coming in the side while also picking up the trumpet dude over there with remarkable clarity…
Mute mics whenever not in use. Always. Don’t leave open mics as they will pick up stuff and add garbage to your mix, contribute toward feedback, and just plain sound bad.
Remember: more mics = more feedback.
Use direct boxes whenever possible. Keyboards, bass, and guitars should all go direct. Avoid miking that cool guitar amp on stage (although many churches isolate the amp back stage). Electric guitars can use amp simulators, which are so good these days nobody in the congregation is ever going to know the difference. Ever.
There are lots of great mics on the market that work well for church sound. I haven’t tried to go into which mic to use on what; there are lots of sources out there for that (although admittedly mostly bad). For now, understanding some basics can help a great deal in selecting a mic and knowing how to use it.
Sending stems to a second console for live stream (part 4)
In part 3 of this series I outlined the ideal scenario for crafting a quality mix for both the sanctuary as well as a live stream using a second console. The idea is to have total control over each mix, but perhaps that’s a bit too much for your volunteers to handle. A simpler way to do sort of the same thing is by submixing stems from the main console, sending each group of parts to the second console. The concept of stems comes from the movie industry, where the audio track is submixed into categories such as dialog, background music, and sound effects. Then when performing the final mix if they want the music down a tad, you grab a single fader rather than 80 of them.
For a stream mix, the main issue is rebalancing chunks of things that need to be set differently than the main mix. For example, for drums it isn’t so much the need to remix the kick, snare, and overhead blend, but rather that the drums overall need to be cranked up for the stream (since you can hear them in the sanctuary acoustically). Maybe the vocals need a bit of boosting so they can be heard better on the stream.
To keep things simple, use an aux send for each subgroup you’re creating, such as drums, band, vocals, and talkies (pastor, etc), following the method I outlined two articles ago. Set the auxes post-fader for the same reasons we described then. Connect each aux output from the console to individual channels of your second console dedicated for streaming. Here’s what it looks like:

The second console operator only needs to touch up the balance between these groups, so your Pro Presenter/OSB operator (or even the main audio operator) could take care of this since it doesn’t require constant attention. You don’t need a fancy console for this; any low cost digital mixer allows you to add additional reverb, maybe touch up EQ, and add a bit of compression on the overall mix.
So we’ve covered three (and a half) ways to provide a live stream mix:
Copy of main mix (yuck)
Aux mix (pretty good)
Second console for stream (awesome)
And you can modify #3 by setting up aux mix stems to feed into the second console (pretty decent). All of these depend on your knowledge level, team members’ skill, size of your team, and resources/budget. Let me know if I can clarify any of this.
Using a second console for live stream mixes (part 3)
In my previous article I outlined two options for sending a mix to a live stream. You can send a copy of your main mix, which isn’t so great, or use the channel aux sends to create an independent mix. That’s probably the sweet spot for most churches because it’s fairly easy to set up, doesn’t cost anything, and doesn’t require additional people to run each week.
The third option is to set up a completely separate console for the live stream. If you can get copies of all your audio sources (stage mics) into this second mixer, then you can customize a mix with its own set of EQs, compressors, effects, and mix balance. This is the ultimate for providing a quality mix in the sanctuary as well as a live feed. It’s also more expensive in that you not only have to get another console (not so bad), you need additional trained people to run it every week (potentially bad). Here’s the plan:
You need to get copies of all your stage sources. At my church we have Dante-enabled mic preamplifier units backstage that connect via a single CAT5e ethernet cable to the Yamaha TF5 console in the sanctuary booth. All of these devices are on the Dante network, which is an ethernet-based digital audio networking protocol. Audio from all connected devices can be shared and transmitted from anywhere to anywhere simply by selecting points on a grid in the software. So, connect the second console to the Dante network (you can use standard network switches used for computer networks; just plug all your devices into this), then launch Dante Controller on a computer connected to the network and select your mic preamplifier outputs, routing them to the channel inputs on the console. (The preamp outputs can go to multiple destinations, so it’s not like you have to choose between the two consoles.)
The audio signals coming into the second console are untouched and raw, meaning no EQ, no compression, no nothin’. This is great, because you can craft your streaming mix from scratch without having any impact on the sanctuary mix (and vice versa). Here’s the overall configuration:

Take your main mix from the stream console and feed it to the audio interface on your live feed computer, balancing the main mix fader and interface level control to set the final level in OBS (or whatever streaming software you’re using). Also check the actual live feed from time to time, meaning go listen to your phone live from Facebook (or at least a recording from the previous service).
To get best results and be worth the trouble, you need to set this second console up in an isolated booth or a different room. You can mix in the sanctuary, but it’s difficult to isolate the live sounds from drums and so forth, compromising the result. In my case, I decided against all of this because I didn’t have another room and didn’t have enough trained individuals to fill in the additional job slot each week. But if you can pull it off, it’s the ideal option.
Mixing for live stream and in-house (part 2)
When the spring 2020 pandemic hit we, like everybody else, had to shut down and figure how to set up a live stream of a bare-bones worship service. As things rolled along, we were gradually able to allow congregants back into the sanctuary for live services. But we still wanted to maintain a live stream for those who weren’t comfortable returning. Long term, while we’re at it, we could continue the remote feed for shuts-ins, people traveling, and others who just want to join in from wherever. A few decision points to consider:
What’s more important, the live feed or in-house? Seems obvious to say “both,” but that takes a level of resources and complication we didn’t have. Which brings up the second question: how many people can we realistic train and have available to run this stuff? A bigger team means we can have multiple job positions each week focused on a variety of tasks. If you only have one or two, however, your options are limited. And finally, do we have the resources (equipment and funds) to follow a more high-end approach?
In our case, we have a very small team and could not realistically foresee having three or four individuals serve each week on AV-related jobs. That narrows our options, which, by the way, is the main topic for this post. There are several approaches for mixing both in-house and live stream, and we’ll focus on two of them here. I’ll cover more later; they get progressively more complex (and better).
Our three options are:
Taking a copy of the main house mix
Creating an aux send mix for the stream
Setting up a second console for a completely independent stream mix
Option #1: Main mix
#1 is easy. Route your main mix to an additonal output on the back of the console. For digital boards, you can do this in a setup screen where you select where that main mix is going. I have a Yamaha TF5, which features Omni outs. This is just a bunch of XLR-M jacks that you can assign anything to. Run an XLR cable from there into an audio interface connected via USB to your streaming computer. Depending on the interface, you might need to use an XLR-F > 1/4” balanced cable so it plugs into the 1/4 jack on the box. This tells the interface that it’s a line level signal, not a mic level signal, and so will avoid potential distortion. Now select that interface in your streaming software, use the level control on the interface, and you’re done.

Everything you do for the house mix also goes to the stream, so you probably have to decide which is more important. Presumably the in-room mix is the priority, so mix to that and accept what gets sent to the stream. So what’s the big deal? Your house mix takes into account not only the electronic signals coming into the console, but also any acoustic sources live in the room such as drums, piano, horns, and so on. You won’t have to blend as much drums into the mix, but those at home can’t hear that live stuff, so the drums will be too low. It’ll sound drier without the natural room reverberation. It’s a huge compromise, but at least it’s easy, costs nearly nothing, and you only need your regular audio person to run things.
Option #2: Aux mix for stream
If you’ve used aux sends on your console to set up a stage monitor mix, you know what we’re talking about. Aux sends are on every channel (aux 1, 2, 3, etc). Turning up an aux on a channel makes a copy of that signal and routes it to a master aux summing amplifier (or virtual bus on digital boards). They’re essentially independent mixers, allowing you to create multiple mixes of the same material.
Select one of your auxes, say aux 1, and turn it up proportionately on each of your channels—maybe a lot of piano and guitar, but less cowbell (I know, I know). Digital consoles allow you to push a button and flip the faders, so you can mix this aux send on your main channel faders. Route the master aux send to a physical output on your console (one of the Omni outs on my Yamaha TF5). Connect this to the audio interface on your streaming computer.

Now, look at each channel’s aux send and find the button labeled “pre.” This stands for pre-fader, and it determines where the copy of the channel signal will actually be taken from the signal path. The two options are either right after the main channel fader (post-fader) or right before (pre-fader). For stage monitors, we want to set up a completely independent mix that won’t get changed as we adjust our house mix. Set the auxes to pre-fader for that.
But streaming is different; while we want to set up a different balance of channels, we also want some of what you do in the house mix to tweak that. Huh? First, a post-fader aux means your main channel mute will also mute the aux feed. This is a good thing here because you’re gonna turn off the band mics when they’re done, and therefore want those same mics muted on the live stream. You certainly don’t want to keep switching back and forth between main and aux layers to do this. You also want subtle tweaks in the mix balance to adjust the stream, since you’re not hands-on mixing both at the same time. When you need to turn up the lead vocalist a bit, or turn down the electric guitar a tad (happens all the time, of course), that will also tweak the stream mix. Once you set a good fundamental balance of everything in your aux mix, go back to your main mix layer and it should be pretty close.
The challenge for setting this mix is that you’re still in the room with all the live stuff going on. Even with headphones I have to push them against my head in the attempt to close out the drums and everything. During rehearsals, walk somewhere else in the building with the console iPad app and tweak it from there.
You don’t have a separate set of EQ and compression/effects for the stream, so it uses the same settings as the house mix. This might not be a big deal, but if you tend to EQ your channels to compensate for room issues such as feedback frequencies and such, then your aux mix will suffer accordingly. Try to get the system overall tweaked out, then EQ for taste. And yes, my channel EQs are a blend of both, so don’t fret too much.
Also keep in mind you can set what parts get sent to this aux mix. In our case, we play pre-recorded music in the room before the service starts. We’re not licensed to do that on live streams (yes, that legal thing, which is really important), so I have that audio channel turned off permanently on the aux mix. You can also add stuff just for the stream, such as an additional reverb or effect. Just make sure to listen to the stream periodically to make sure it’s getting what you intended.
What I decided to do in our case
We haven’t talked about option 3, a second console, but that wasn’t in the cards for us. And a main mix copy was pretty bad, to be honest. It wasn’t close enough. Would it work? Sure, but setting up an aux mix is not difficult, doesn’t require special training or a second person on the team, and it finesses things much better for the stream. Once I get it in place, the volunteers don’t even need to know it’s there, although I encourage them to take a listen once in awhile. For most of you, this is probably the best way to go, so give it a try and let me know what you run into.
Jumping into live streaming headfirst (part 1)
Many of you have been live streaming for years, but for the rest of us we got forced into the game when the pandemic shut down church services during spring 2020. In my case, we could only have a few individuals in the church at one time, so the challenge was offering a decent experience to our church members at home. No band, at least at first, and we didn’t have the fancy camera rigs and stage lighting. One pastor, one leader on the piano, and eventually a second singer. Yup, thoroughly exciting, but that’s the deal. Here’s what we did:
I set up a Yamaha TF1 (the small version) on a table up front. Another table had the Mac Mini running Pro Presenter and OBS for the live stream. I rerouted all the stage mics and wireless talkie mics straight to this console, bypassing the entire sound system. The main output fed an audio interface which connected to the Mini. Overall level control was through individual channel faders, main mix fader, and the level control on the interface. Pretty simple.
The nice thing about this was that I could completely customize the mix for the stream, since we weren’t feeding the room. EQ, compression, reverb, and the overall mix balance was targeted for our remote audience, which is a different deal from a live room. Since there wasn’t much going on in the room (no band other than the piano), I could monitor decently on headphones, verifying everything by going out in the hallway and listening from the actual Facebook feed on my phone.
We learned a couple lessons also. We set the FB feed to go live about ten minutes early, so we had to remember to keep everything muted until actual service start time so folks at home wouldn’t hear us talking about stuff. Open mics are more noticeable when listening on headphones and earbuds, so turning mics on and off is more obvious (do a quick fade in and out along with the on/off button). You have to keep a close eye on audio levels in OBS, the streaming software, to make sure it’s loud enough (for some reason it’s got to be awfully near the top to sound normal), but without overdriving and distorting everything. Clear verbal and hand signals were established to make sure everybody knew when the camera and audio feed was live, when to transition to something else, and so on. It’s awkward, especially for the poor souls on stage who’ve never done anything like this. With nobody in the room except a couple of oddball tech team folks, there’s no energy or feedback to draw on. It takes practice and a good deal of patience. But we got something out there, and it held us over for a few months.
Gradually we got really fancy, such as buying a video switcher to take different video sources, such as multiple cameras, and learning how to transition scenes. The HDMI output of this device went into our Mac Mini to feed OBS. We learned a bit about OBS, the free streaming software, where you can set up the overall screen layout with main content (camera feed, slides, etc), logo in the corner, lyrics overlaid on camera feeds, or whatever). It’s not that hard, just takes a bit of experimenting and learning how it works.
So with our simple setup we got the job done. Thankfully we had the resources already, such as the TF1 console, so it wasn’t a big expense. I did discover one of the audio interfaces hadn’t had its level pot changed in so long it stopped working when I tweaked it for the OBS feed, and of course our wireless head mic started popping randomly (a lot) with a bad connection to the transmitter. These were old anyhow, so after replacing them we were in good shape. Always something. Next time I’ll describe our transition when we were allowed to have people in the building, requiring both a live stream and in-house mix.